IndretsVR Virtual Tour for Unity
indretsvr.com @ 2023
Download and Install
IndretsVR Virtual Tour package can be easily installed in your Unity project.
1. Click on the following link to download the package:
IndretsVRVirtualTour.unitypackage
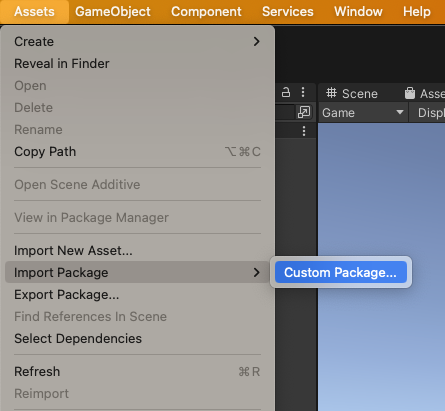
2. import the package into your project through Assets -> Import Package -> Custom Package...
And that's it! You can have a look at our Beginner Tutorial if you need help using the package.
If you like the Package, please consider donating to support the project!
Beginner Tutorial
Creating a Virtual Tour with IndretsVR Virtual Tour package for Unity couldn't be easier following these steps:
Quick Note: If you don't have any 360º images right now to follow the tutorial you could obtain some for free at Pixexid
Here we go:
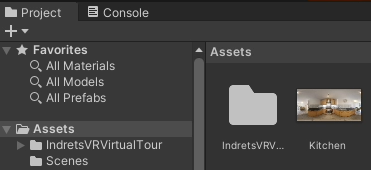
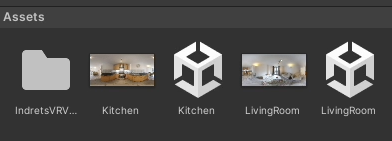
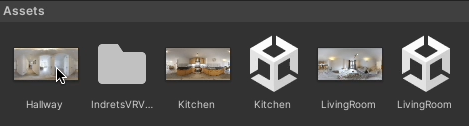
1. Import a 360º image inside your Assets folder (or an Images folder inside Assets, etc... your folder structure is up to you)
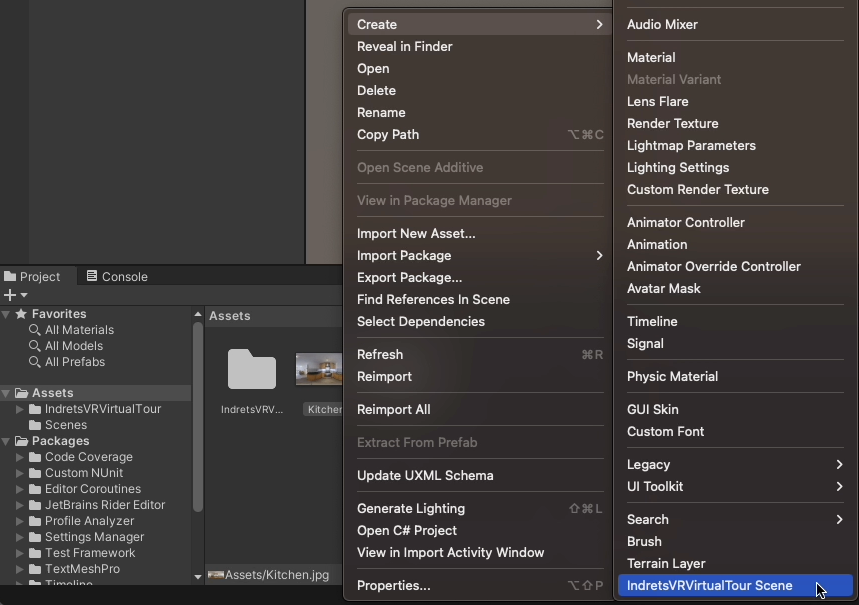
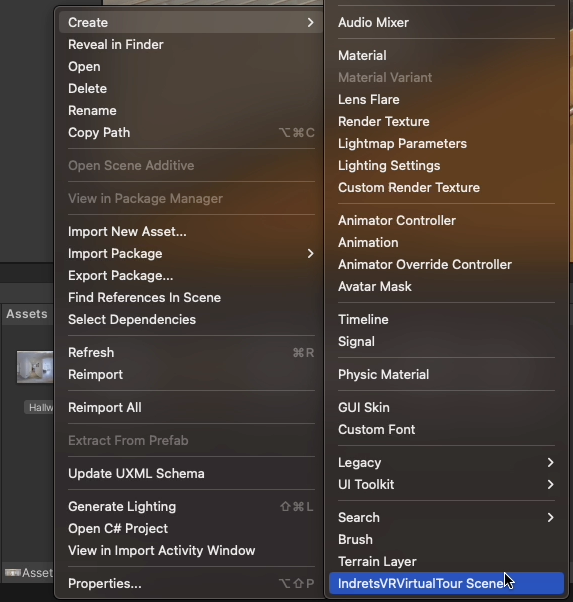
2. Click on the image with the right mouse button and select Create -> IndretsVRVirtualTour Scene
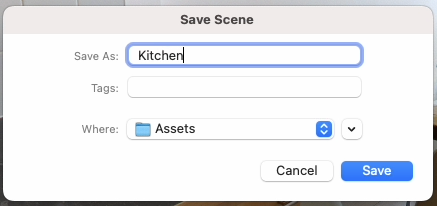
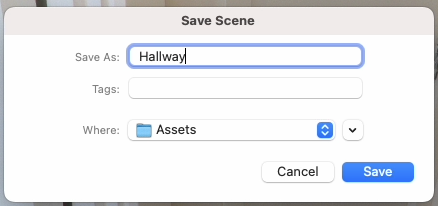
3. Et voilà! The first stage of your Virtual Tour. That was easy, wasn't it? Now save the Scene with a relevant name, Kitchen in my case. Choose the folder that better suits you.
4. Now we are going to repeat the steps 1-3 with a second 360º image. LivingRoom.jpg in my case.
5. This is getting interesting. Now we are ready for a very simple, but yet powerful, Virtual Tour.
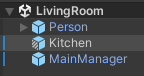
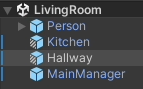
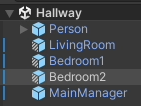
6. Open the Kitchen scene. As you see we have 3 objects: Person, Hotspot and MainManager. We'll learn more about them in the Intermediate Tutorial and the Advanced Tutorial.
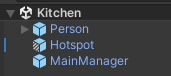
7. For now we are going to rename the Hotspot object to something more relevant, in my case LivingRoom, because this is where we want to move when we click over the hotspot with the mouse left button.
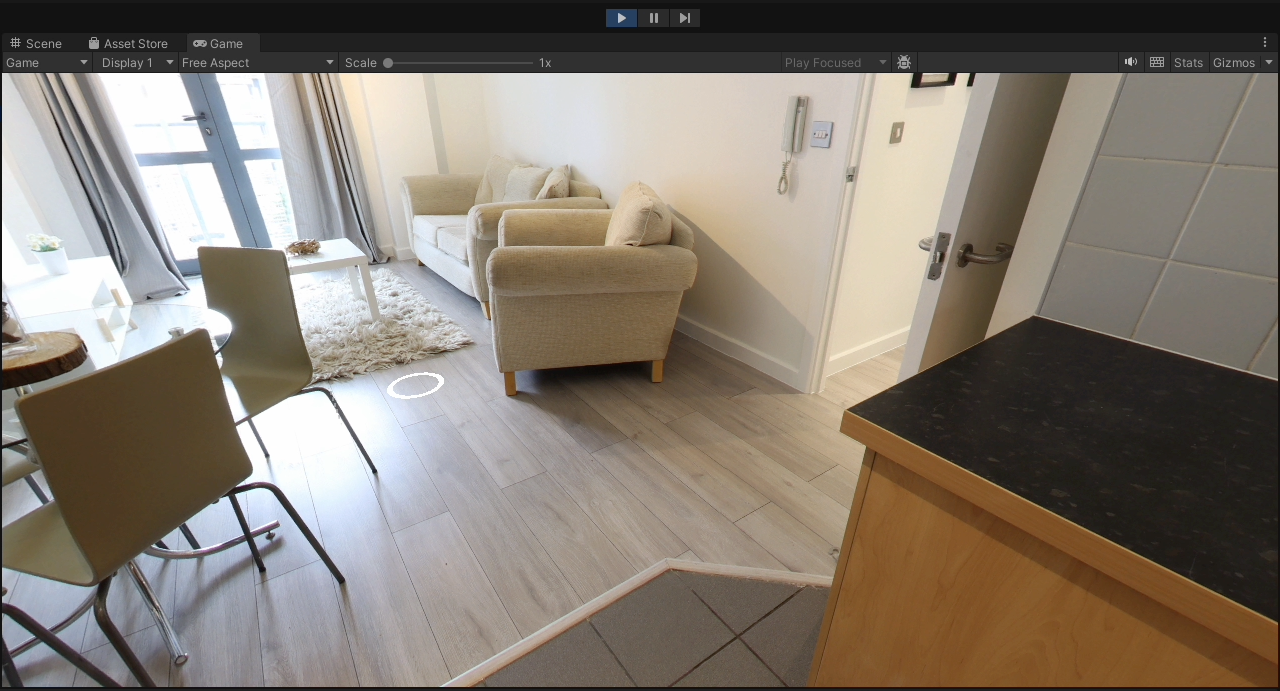
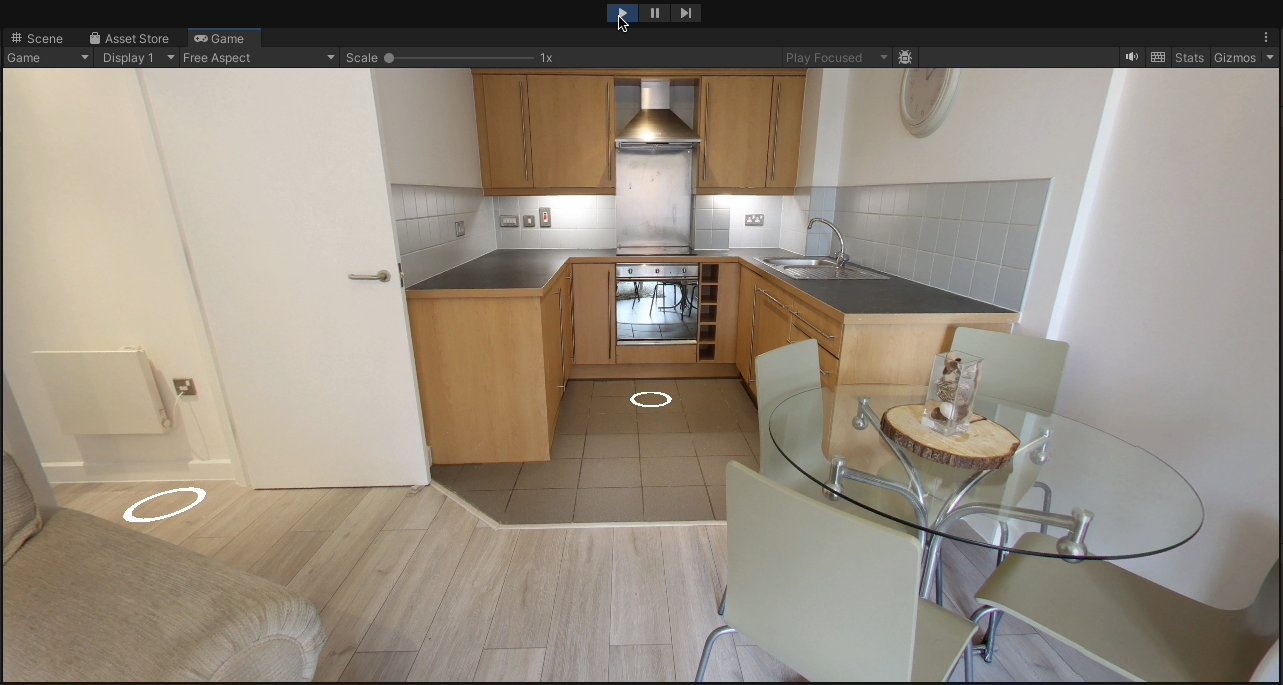
8. We need to position the hotspot in an appropriate place. To do that, please enter Play Mode by clicking on the Play button.
9. If you click with the left mouse button anywhere on the scene and, without releasing it, move in any direction, you will find that you can rotate and visualise the entire room.
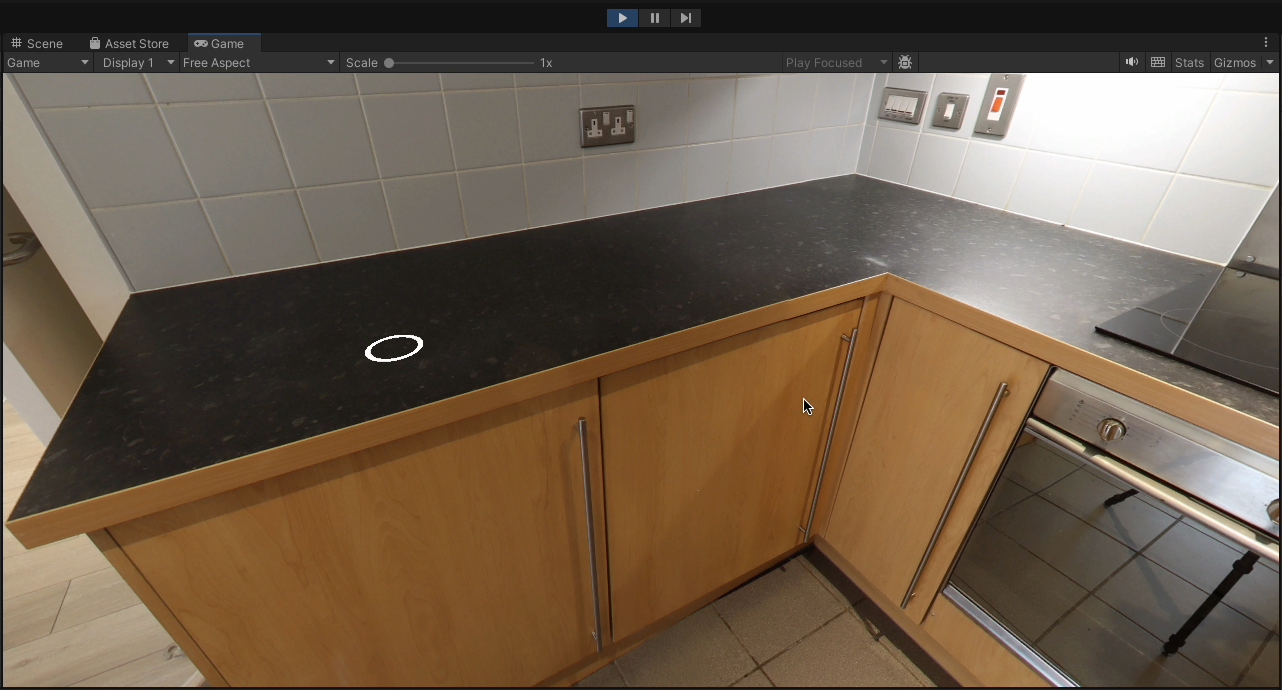
10. The Hotspot is in it's default place. Rotate in order to find the most appropriate position.
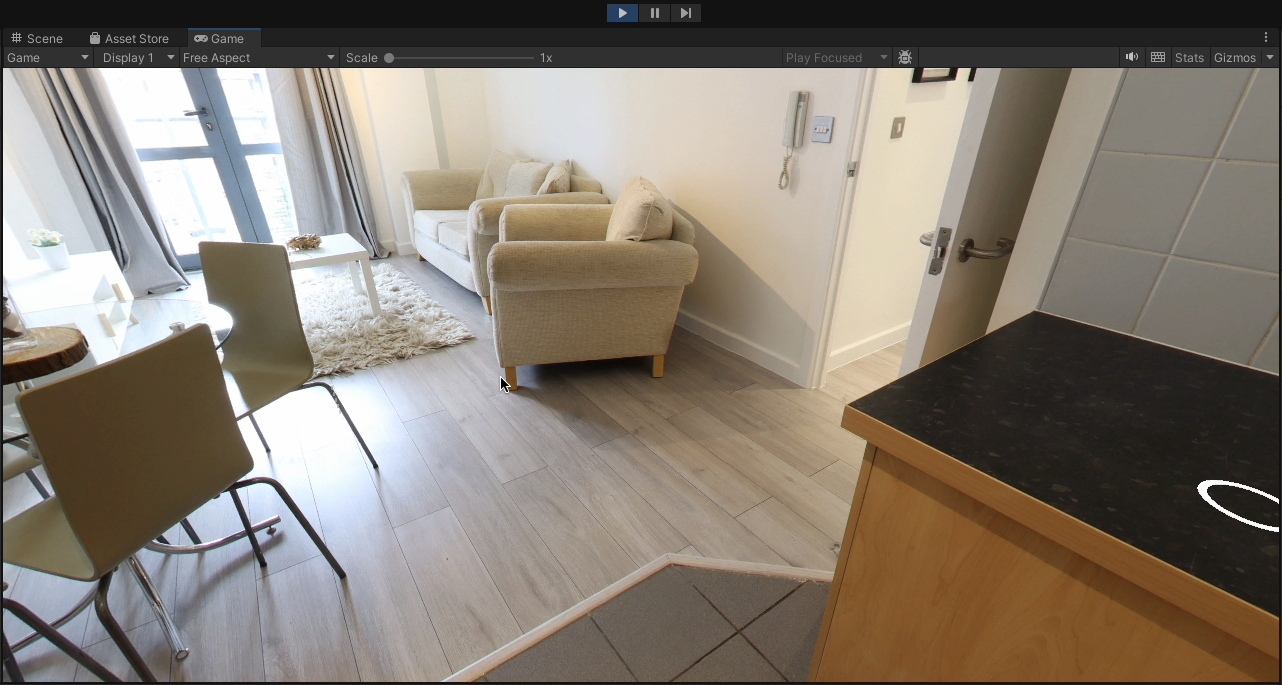
11. Drag&drop the hotspot using your right mouse button. By the way, this will not work in your built Virtual Tour app, for obvious reasons :)
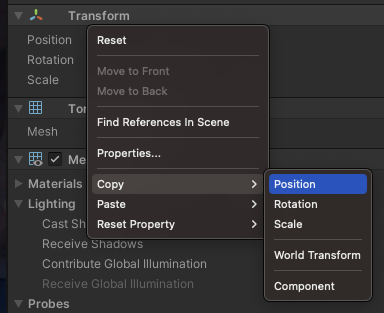
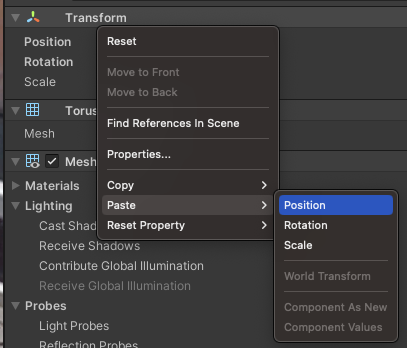
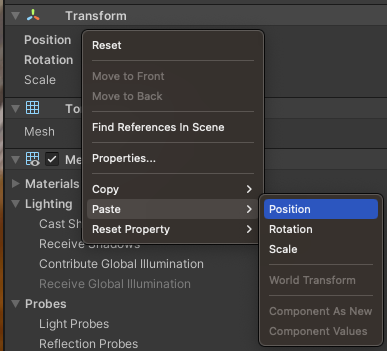
12. Now we need to keep these Hotspot coordinates when we leave Play Mode. With the hotspot (LivingRoom object) selected on your object hierarchy, go to the Inspector and right click over Transform -> Copy -> Position
13. Leave Play Mode and, with the Hotspot selected, go to the Inspector and right click over Transform -> Paste -> Position. Next time you got into Play Mode the Hotspot will be placed where we want it to be.
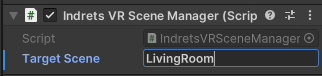
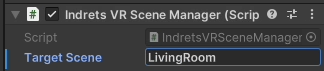
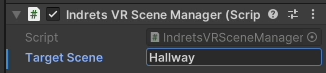
14. Now we want to go to the LivingRoom when we click on the hotspot. In the Inspector, locate the Indrets VR Scene Manager component attached to the hotspot, and set the Target Scene. Save the scene after that.
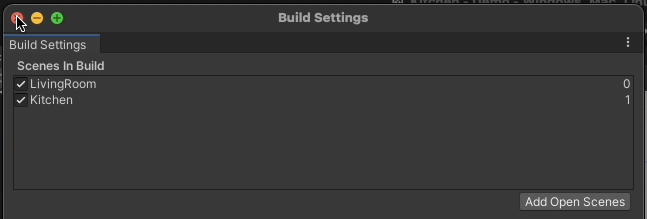
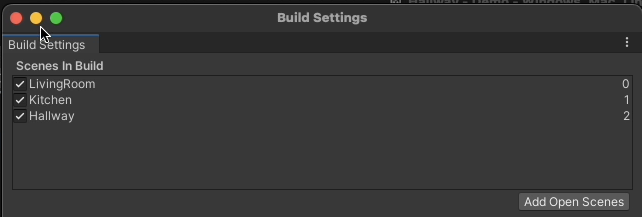
15. If we go to Play Mode you should now be able to navigate to the LivingRoom scene. But before that let's go to the Build Settings and add our Scenes.
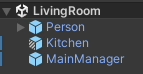
16. Open LivingRoom Scene and repeat the process to rename, place and set the position of the Hotspot. We want it to be Kitchen.

And that's it, this is our first Virtual Tour. Not the most exciting one, but it shows the simplicity and potential of the IndretsVR Virtual Tour package for Unity.
Now, if you want to know more, you can proceed to the Intermediate Tutorial
If you like the Package, please consider donating to support the project!
Intermediate Tutorial
In this Tutorial we will continue with the project that we started in the Beginner Tutorial. If you haven't done it, please have a look at it.
Let's go!
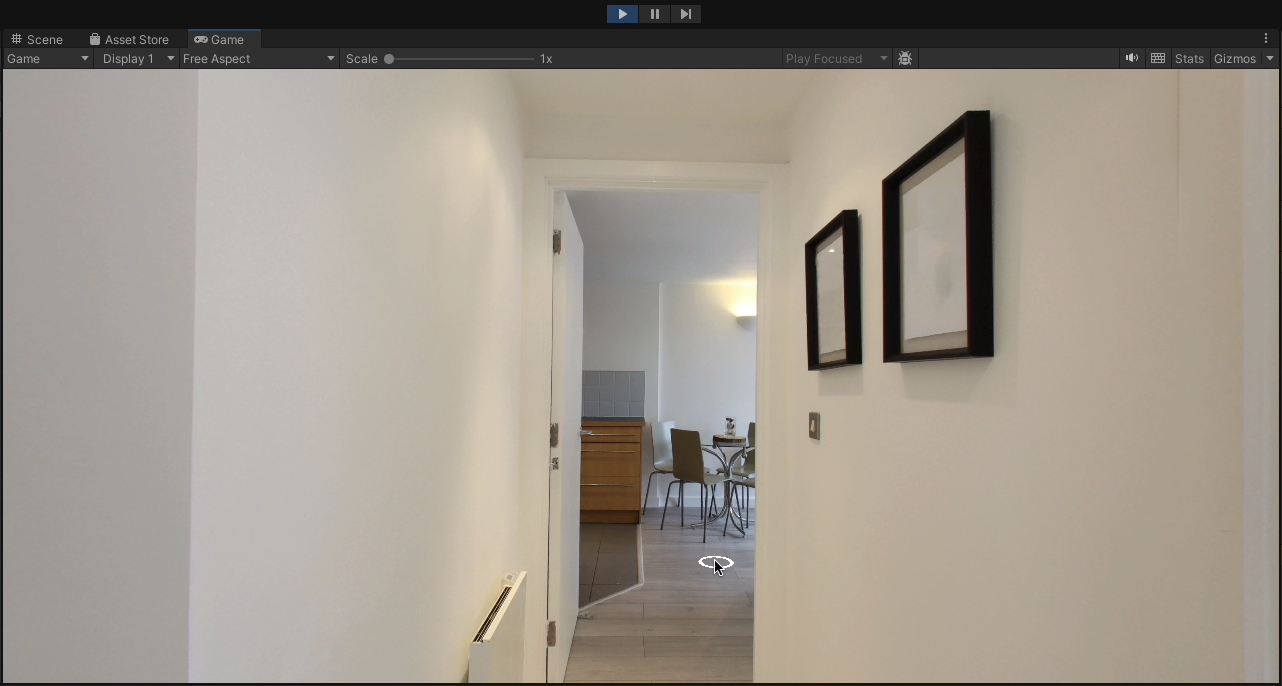
1. Import a new 360º image to create a new IndretsVRVirtualTour Scene. Hallway.jpg in my case.
2. Right-click with your mouse over the image and choose Create -> IndretsVRVirtualTour Scene
3. Save the new Scene with a relevant name
4. Add the Scene to the Build Settings
5. Rename the Hotspot to LivingRoom, because it will be our Target Scene. It's not mandatory to name your Hotspots and your Scenes the same, but it will help you identify things quickly.
6. Go into Play Mode and place the Hotspot where you want it to be. Remember to copy its position with Transform -> Copy -> Position
7. Exit Play Mode, set the new Hotspot placement with Transform -> Paste -> Position and set its Target Scene to LivingRoom. In this case is mandatory to use the name of the Scene, as you already guessed.
8. Let's go back to Play Mode to check that everything is working as expected.
9. If everything looks good, save your Scene (if it's not) and open LivingRoom
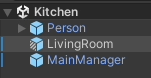
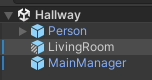
10. Duplicate the Kitchen hotspot object and rename it to Hallway
11. Set its Target Scene to Hallway too
12. Now enter Play Mode. Since we have duplicated the Kitchen hotspot, now both hotspots will be placed in the same position. Select the Hallway object in your hierarchy and modify (slightly) its X or Z position in the Inspector, so you can identify which one is it. Now you can Drag&Drop it to the desired position with your right mouse button. When you are happy with it, copy its position with Transform -> Copy -> Position
13. Paste the new position to the Hallway hotspot right-clicking on Transform and then choose Paste -> Position
14. You can go into Play Mode and check that everything is working as expected.
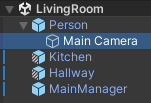
15. As you may have noticed (or maybe not) when an Scene is loaded, the camera is not always showing the most exciting view. But fortunately, we can fix that! If you unfold the Person object, you'll reveal the Main Camera object.
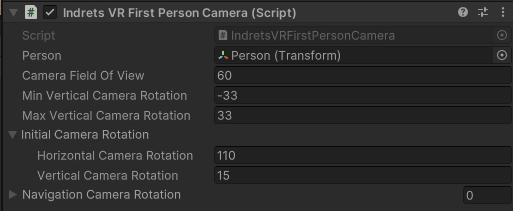
16. Select the Main Camera and in the Inspector you will see all the different values that you can set to tune-up your Virtual Tour, from a Camera perspective. For now we are going to focus in the Initial Camera Rotation
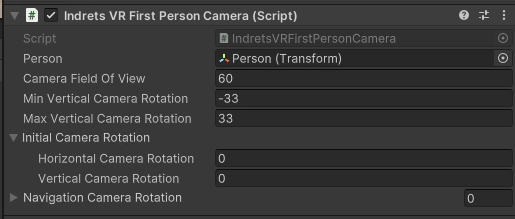
17. If you want your camera to turn 90º right (from its current position) when the scene loads, set 90 as the Initial Camera Rotation -> Horizontal Camera Rotation. If you want it 45º to the left, set -45 . If you want to set a positive value and get the same result you can set 315, which is 360 - 45.
18. You can do the same with Initial Camera Rotation -> Vertical Camera Rotation. If you want to rotate your camera upwards you can use a negative value (or subtract it from 360). To rotate your camera downwards use a positive value.
19. Again, you can check in Play Mode that the Camera is pointing to the proper place when the Scene loads.
20. Let's add two new IndretsVRVirtualTour Scenes with all what we have learnt:
Bedroom1
Bedroom2
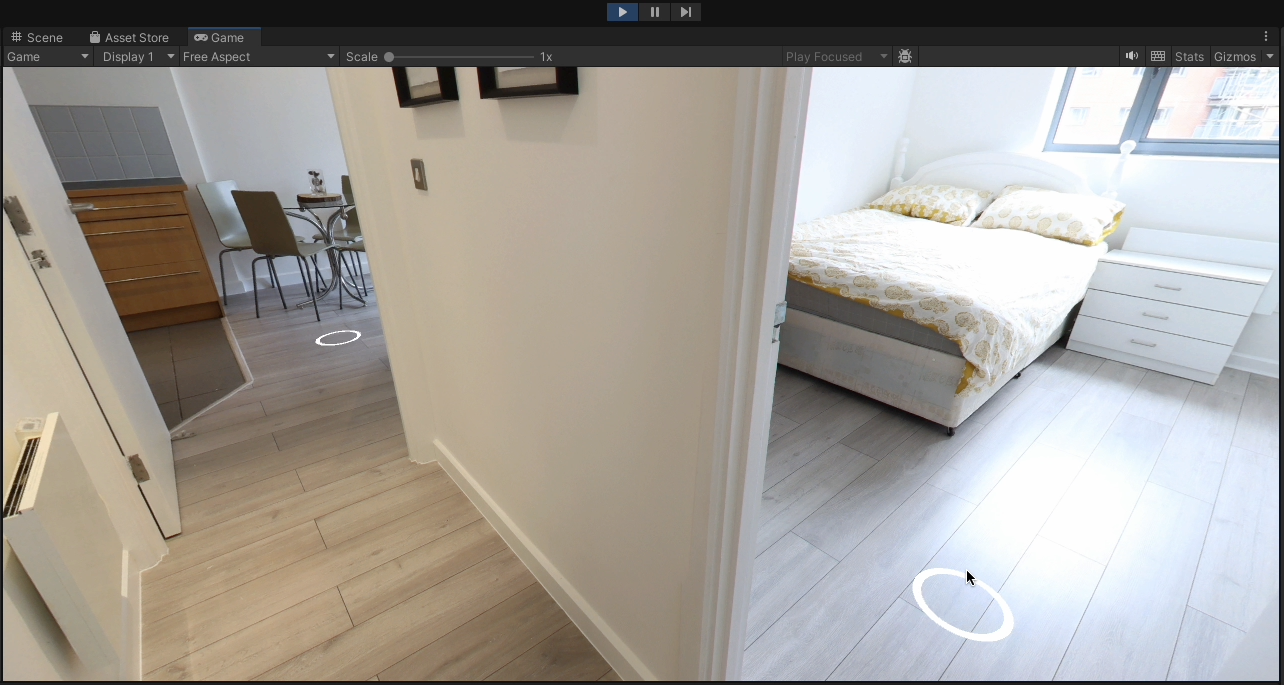
21. In the Hallway, add Hotspots for the two bedrooms
That's all for now. In the Advanced Tutorial we'll have a look at all the settings that you can customise, so if you want more, go for it!
If you like the Package, please consider donating to support the project!
Advanced Tutorial
In this Tutorial we will continue with the project that we started in the Beginner Tutorial, and that we improved in the Intermediate Tutorial. If you haven't done it, please have a look at it.
1. First, let's set the Initial Camera Rotation for all our Scenes until they suit our needs. Go on to step 2 when ready.
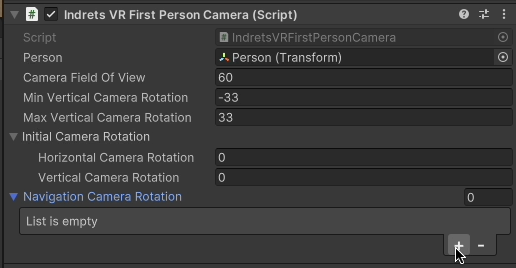
2. As you know, we have 3 Hotspots in the Hallway, this means we can "land" in the Hallway from three different Scenes: LivingRoom, Bedroom1 and Bedroom2. What if we want to have different Initial Camera Rotation depending on which room we are coming from? Fortunately, we can do that with the Navigation Camera Rotation. Let's open the Inspector and add a new element in the Navigation Camera Rotation
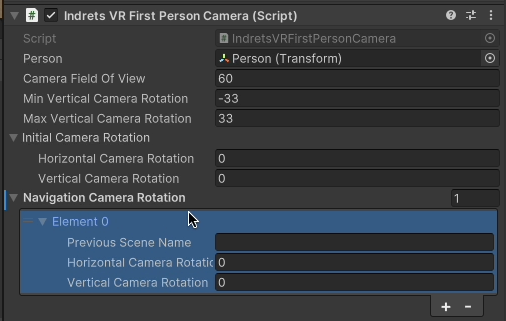
3. I'm going to define different rotations depending on which Scene we are coming from. Actually is not necessary to define a specific orientation for a Scene when you want it to be the same as the Initial Camera Rotation.
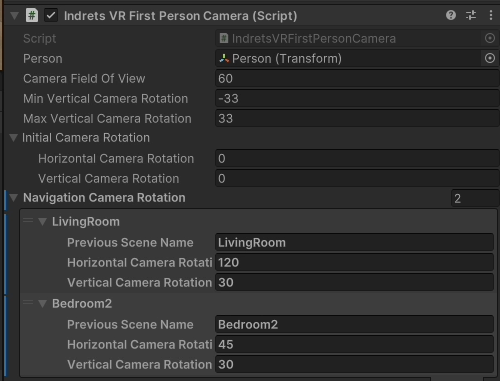
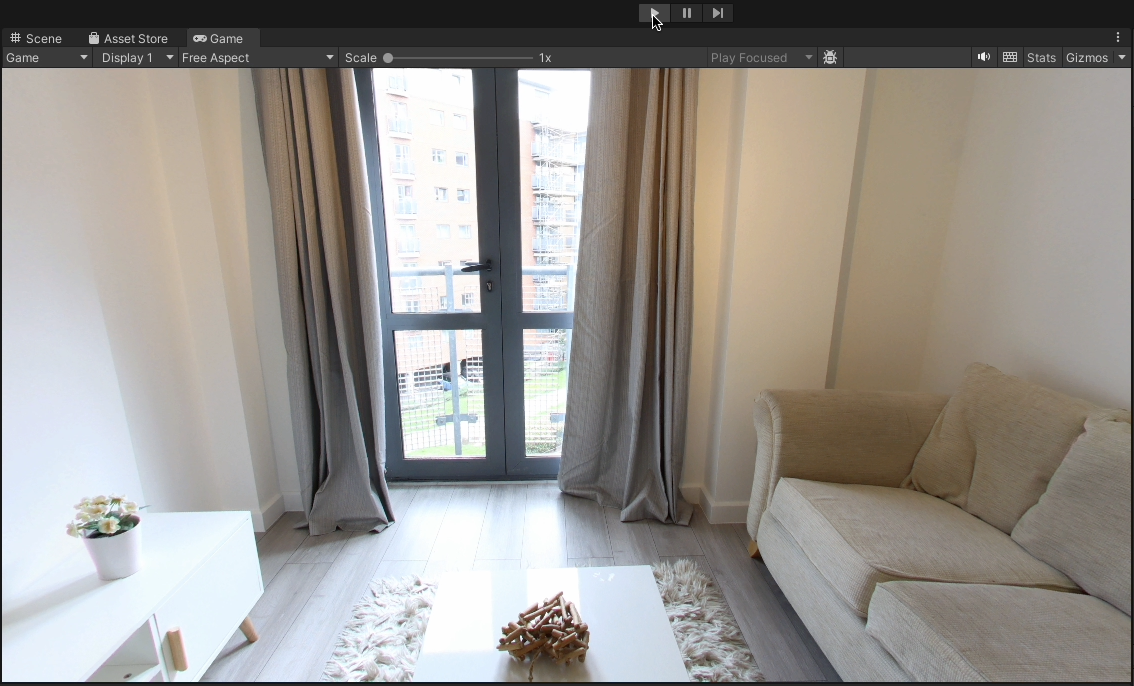
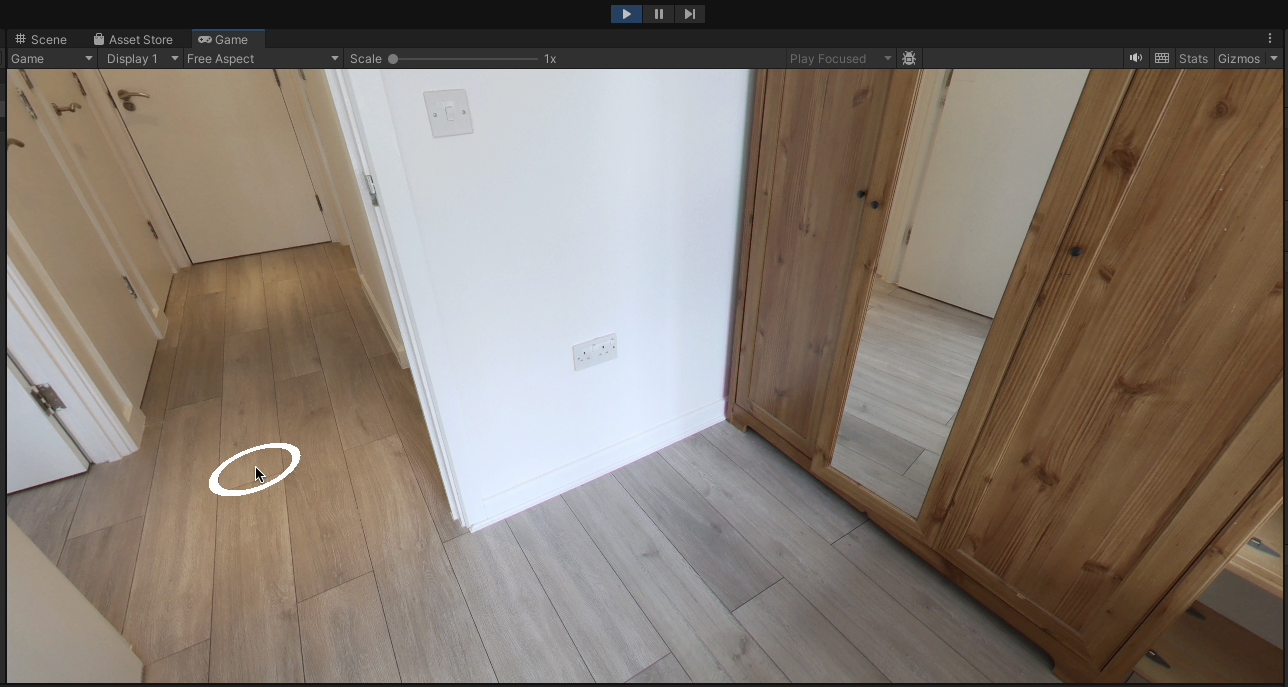
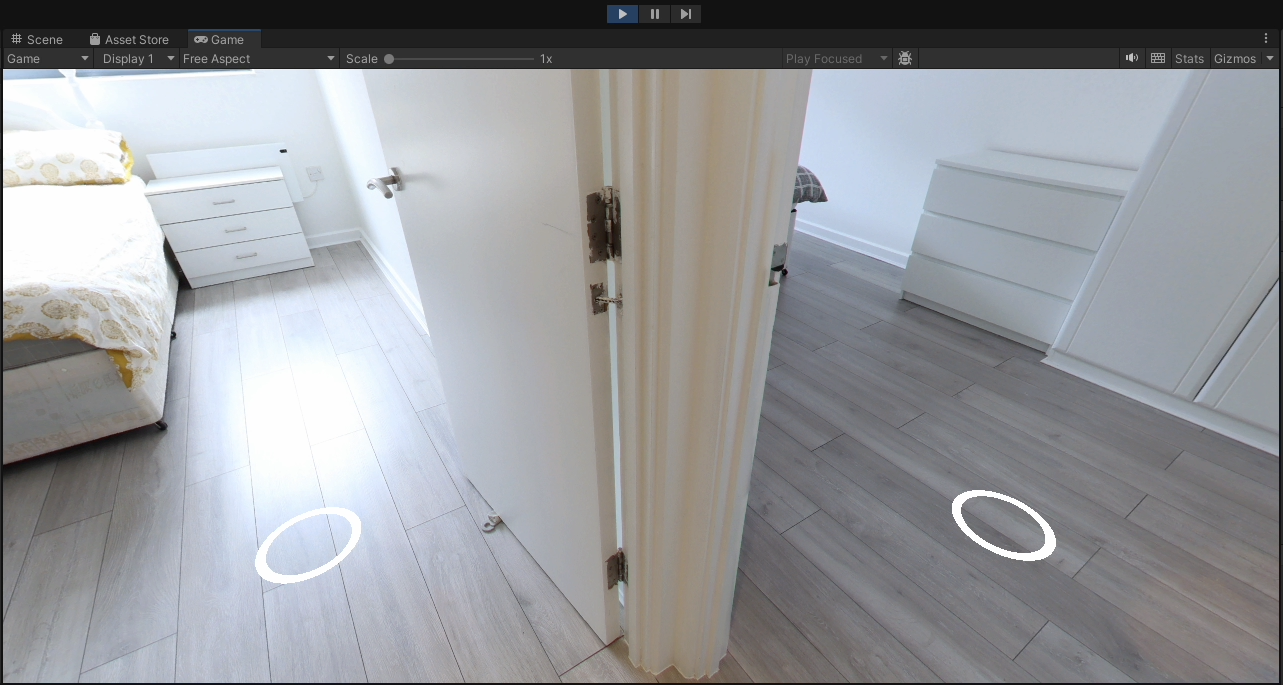
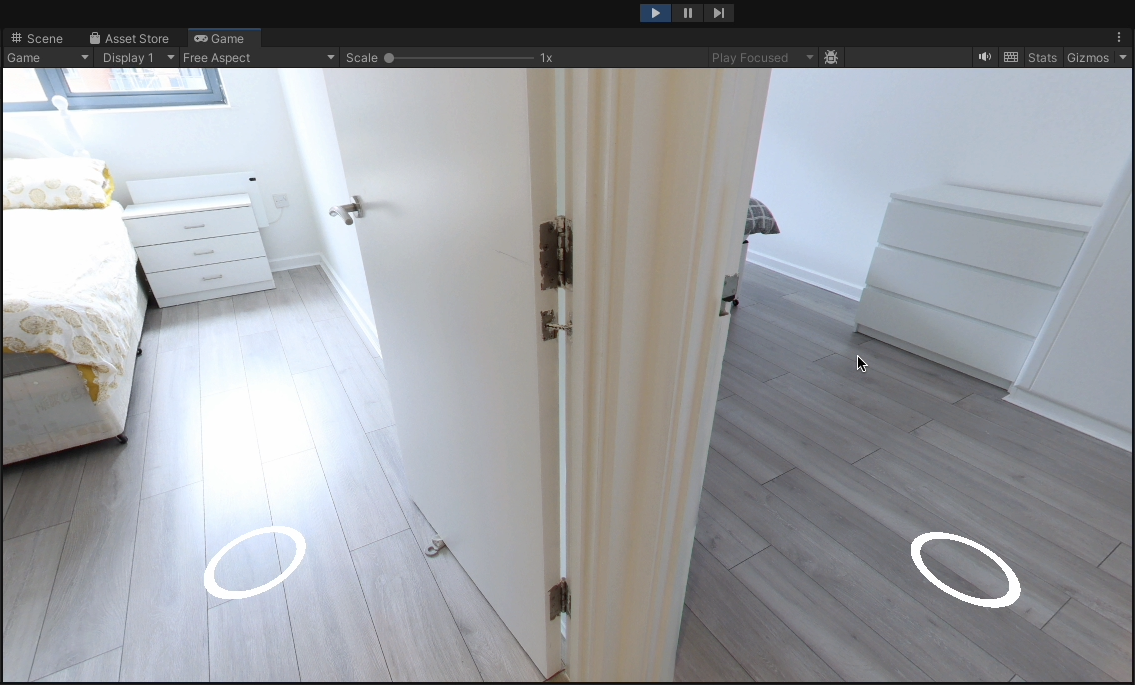
4. This is the initial view when I land in the Hallway from the LivingRoom
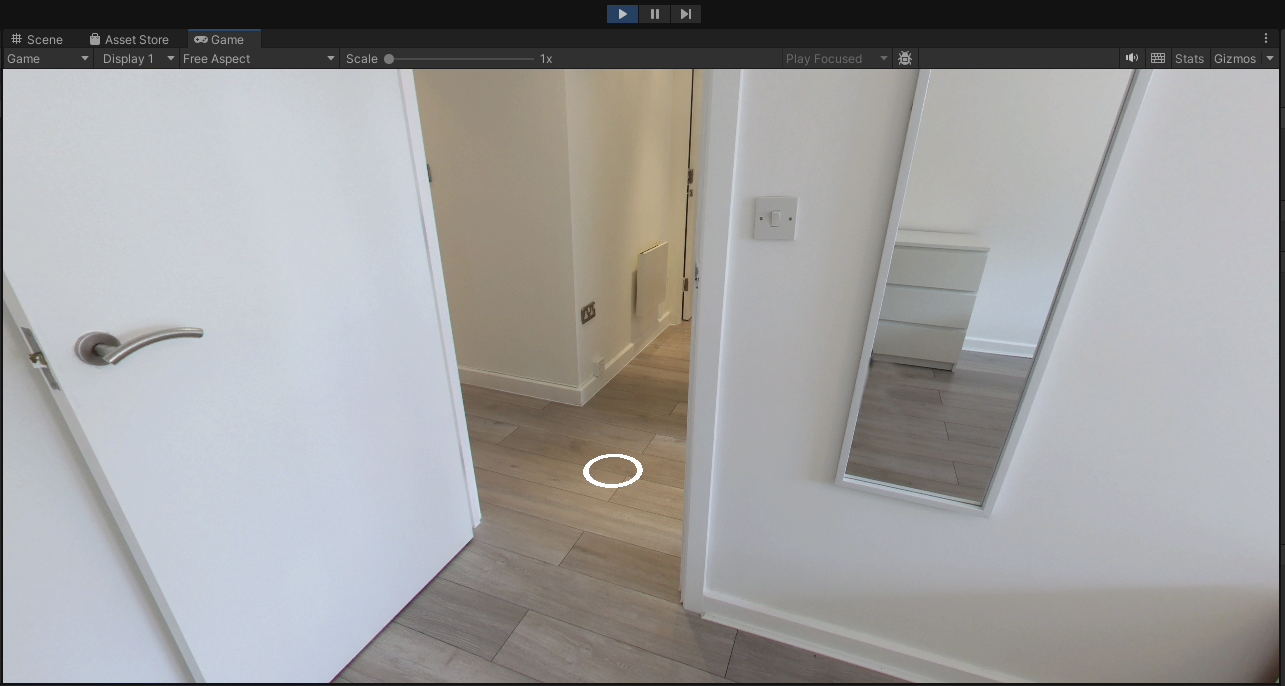
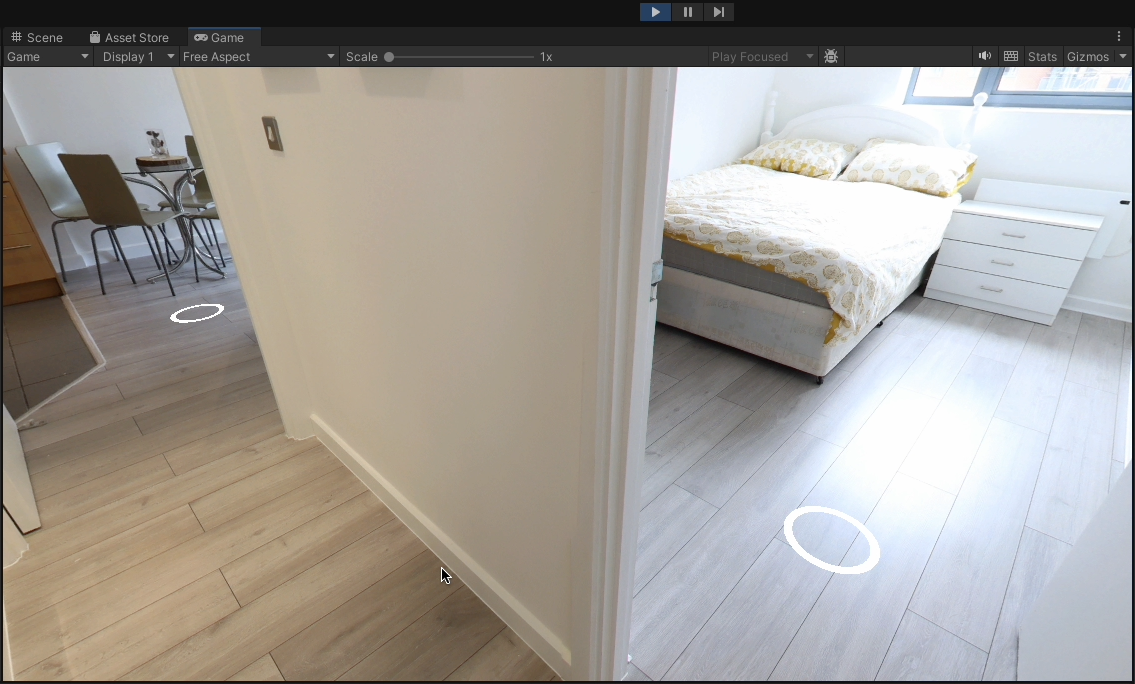
5. And this is the initial view when I land in the Hallway from the Bedroom2
6. Maybe is not too exciting, but I think it can be useful for example if you are walking across a hallway with many hotspots all the way. You might want to keep the navigation direction to offer a better experience to the viewer.
7. You can also limit the Min and Max vertical rotation of the Camera (and in fact, I recommend it). By default you can rotate between -33º and 33º, being 0º the horizon line. Feel free to experiment with it. If you want to change it globally you can modify the values in the Person prefab -> Main Camera

8. You can also experiment with the Camera Field Of View but it can give you some weird results. I've found 60 is the one that better suits me. If you plan to use a different one you might want to change it in the Person prefab -> Main Camera so it affects all your scenes.
9. If you select the Main Manager object and go to the Inspector, you'll find a few more settings. You don't need to modify these settings on the Main Manager prefab. They will affect all your scenes anyway:
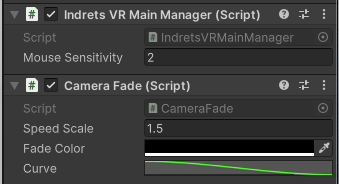
- Indrets VR Main Manager script
- Mouse Sensitivity will determine how fast the Camera rotates when you Drag&Drop your mouse. The higher, the faster. Depending on the size of your images you might need to adjust this.
- Camera Fade script is provided by ReCogMission with some minor adjustments to my needs and is used for the fade in / fade out transitions between scenes. The main values are exposed in the inspector:
- Speed Scale specifies how quick your scene will fade in / fade out. The higher, the faster.
-
- Fade Color is quite self explanatory
-
- Curve lets you modify how the fade animation goes. Feel free to experiment but don't get out of bounds or things may not work as expected.
This is the last of the Tutorial series. Feel free to ask any question you may have and enjoy using IndretsVR Virtual Tour package for Unity!
If you like the Package, please consider donating to support the project!